Knowing how to tell when brake pads need replacing comes down to one measurement and a few sounds. Replace the friction material at 3mm (about 1/8 inch) or less, or sooner if you hear metal-on-metal grinding, feel a vibration through the pedal, or get a brake warning on the dashboard. New pads usually measure 10-12mm, so a check every 10,000-15,000 miles catches wear well before anything goes wrong.
The annoying part is that pads wear with use, not with the calendar. Two cars with identical mileage can be miles apart, because stop-and-go city traffic, towing, hills and long descents eat friction material far faster than steady highway driving.
Good news: the check itself takes about twenty minutes with a flashlight and a ruler or caliper. This guide walks through what to look for, how to measure it properly, and which noises mean nothing at all.
Table of Contents
- What You Need
- Step-by-Step: How to Tell When Brake Pads Need Replacing
- 1. Check the Dashboard for Brake Warnings
- 2. Notice Changes in Braking Behavior
- 3. Inspect the Visible Pad and Rotor
- 4. Measure the Pad Material to Tell If It Needs Replacing
- 5. Decide Whether the Vehicle Is Safe to Drive
- Brake Pad Wear Stages
- How Long Brake Pads Last and What Shortens Their Life
- Common Mistakes
- Frequently Asked Questions
- How long will brake pads usually last?
- Does squealing always mean the brake pads need replacing?
- How thin is too thin for brake pads?
- Do the brake rotors need replacing at the same time?
- Is it safe to drive after a brake pad warning light comes on?
- What is the 30/30/30 rule for brakes?
- What to Do First
What You Need
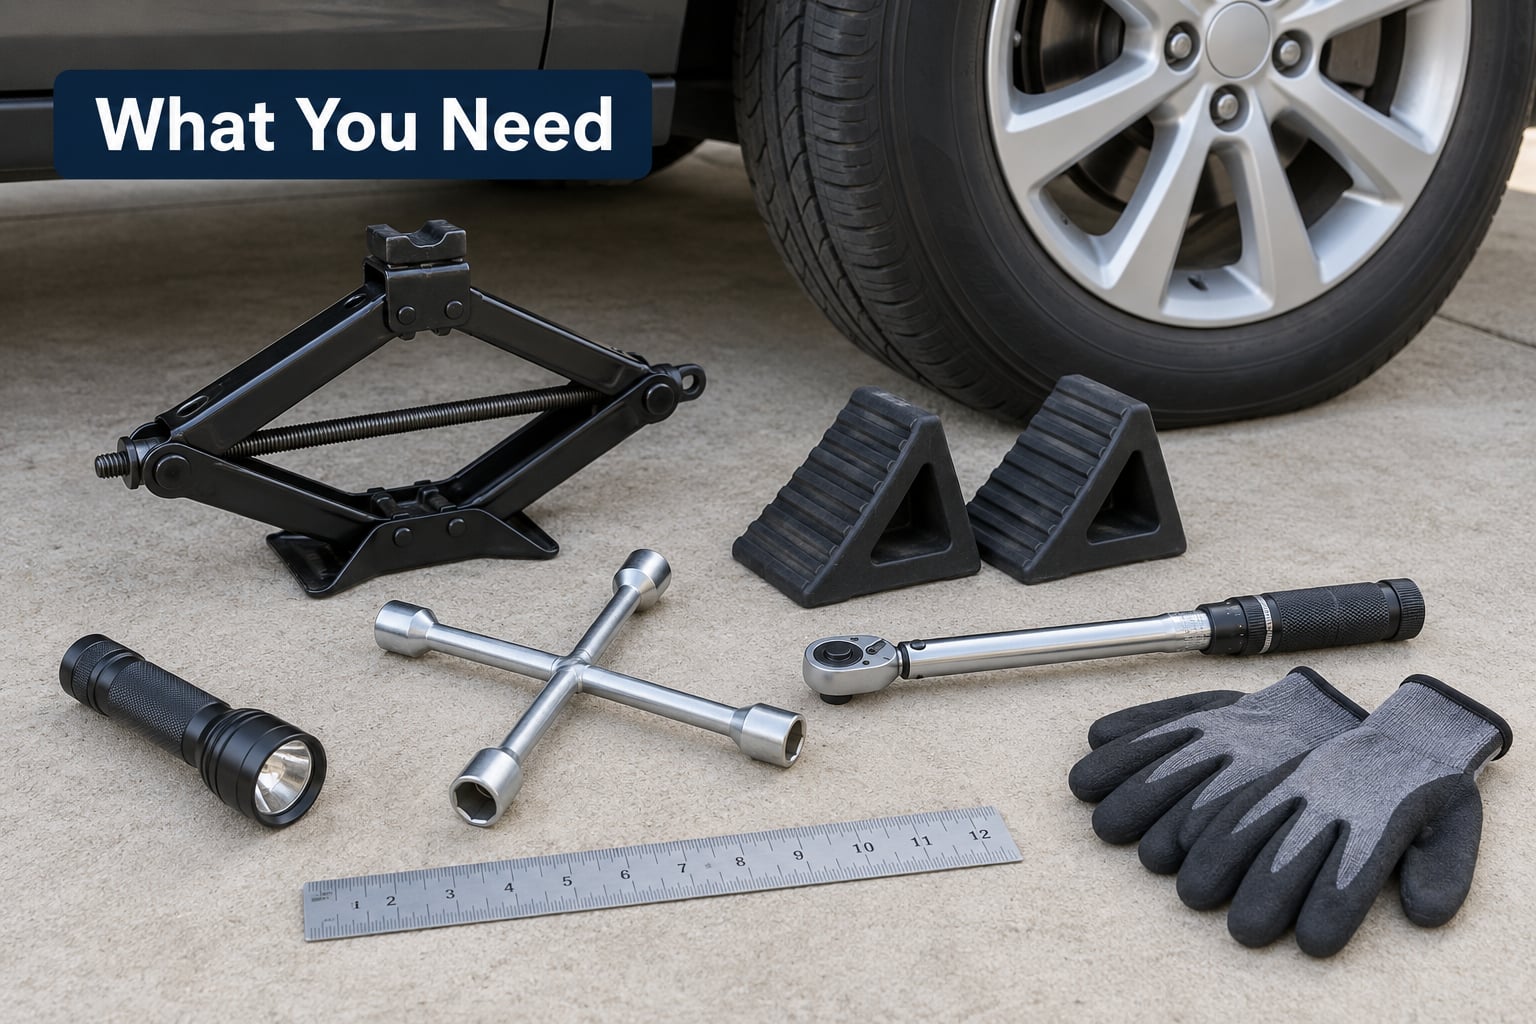
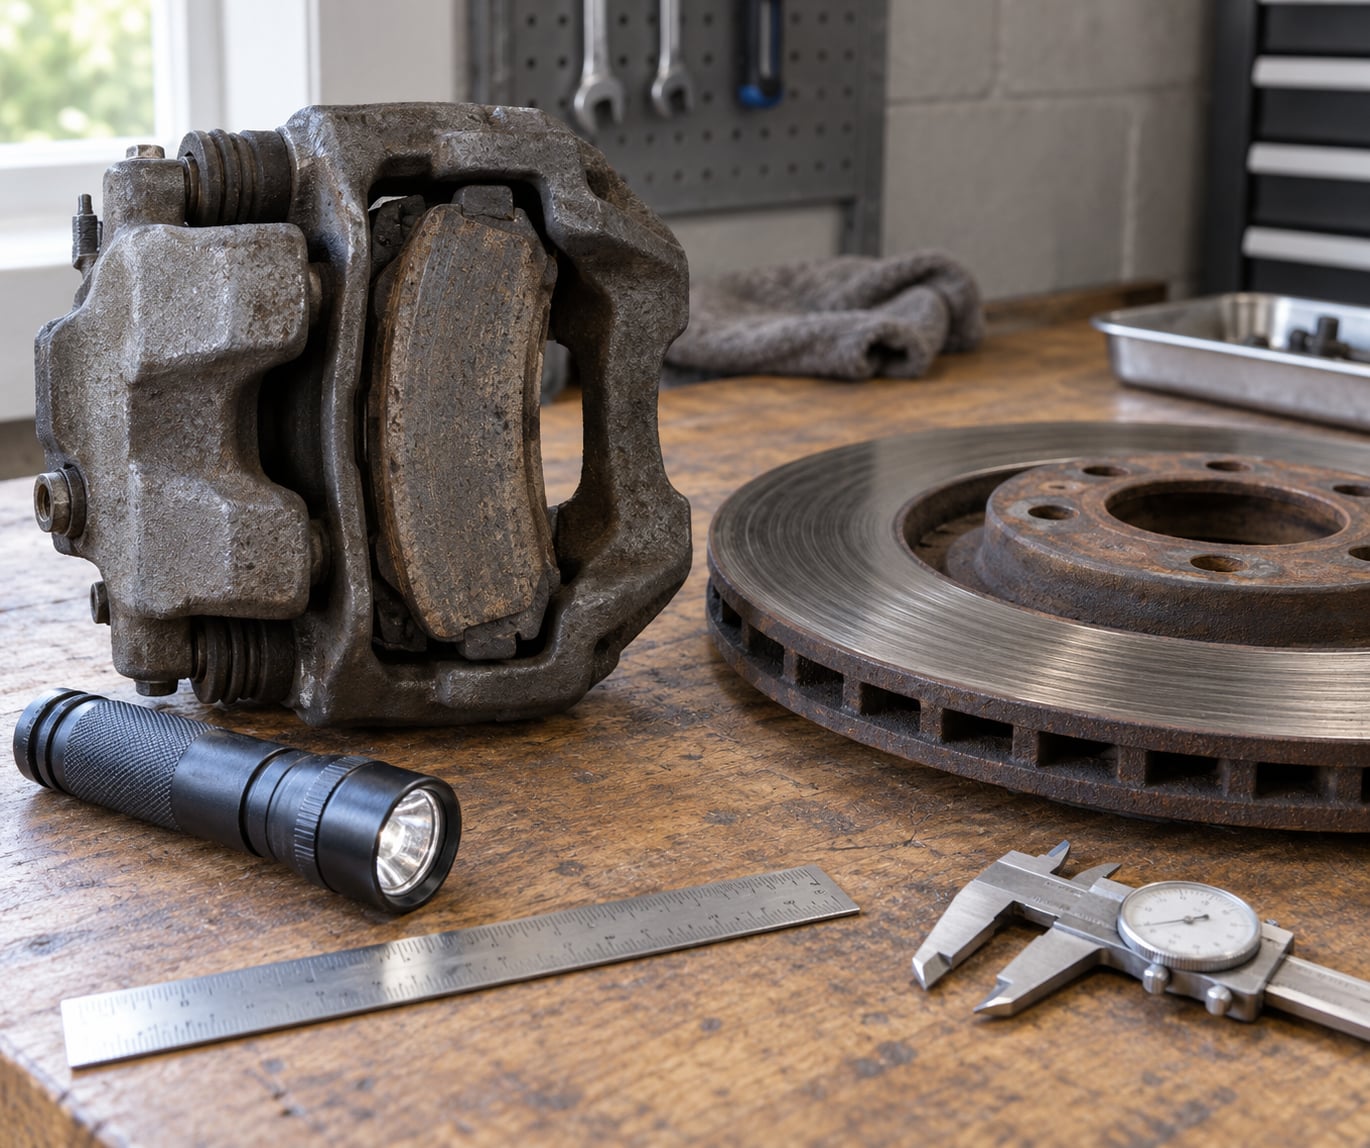
A working flashlight, a ruler or cheap brake pad thickness gauge, wheel chocks, a jack, a lug wrench, a torque wrench and gloves are enough for a visual and measurement check on most cars.
Add your owner’s manual, because it lists the minimum friction material thickness for your specific vehicle and the torque figure for the wheel nuts. Where the manual and any generic advice disagree, the manual wins.
Check the brake fluid level in the reservoir while you are there. A low fluid level and a pedal that sinks toward the floor point at a leak or air in the lines rather than at worn pads, and that needs a shop, not a ruler.
Step-by-Step: How to Tell When Brake Pads Need Replacing
Work through these in order. Dashboard warnings first, then how the car behaves, then a look through the wheel, then an actual measurement, and finally an honest judgement about whether the car should move at all.
1. Check the Dashboard for Brake Warnings
A brake warning means the braking system has flagged something, so treat it as a prompt to arrange service rather than a light to ignore.
The lights are not all the same. A brake system or ABS warning points at reduced braking performance and deserves a shop appointment the same day. A parking brake light that stays on usually means the parking brake is engaged or a switch is faulty. A pad wear light is the one wired to a sensor in the pad itself.
That pad wear sensor is a small metal tab on the pad shim, or a separate sensor wire clipped near the caliper. When the friction material wears down to a set depth, the tab touches the rotor and completes the circuit. A light means measured wear, not guesswork, so a car with the light on should be scheduled, not driven indefinitely.
One caveat worth knowing: a pad sensor light can also come on because the sensor itself has failed or the wire is chafed. If your pads measure thick and the light keeps returning, ask a technician to read the codes and check the sensor circuit before buying parts.
2. Notice Changes in Braking Behavior
Grinding that gets louder the faster you drive is metal on metal, and it means the pads are finished. Squealing at low speed is usually the wear indicator touching the rotor, which is an earlier warning and a request for service, not a failure.
Other changes worth noting: a steering wheel or pedal that pulses when you brake at speed, a car that pulls toward one side under braking, a pedal that feels spongy or travels further than it used to, longer stopping distances, or a hot sharp smell after ordinary braking.
None of these pin down the failed part on their own. A pulsing pedal usually points at a worn or warped rotor, and a soft pedal usually points at air or moisture in the brake lines. Symptoms tell you the system needs attention; they don’t tell you which component is responsible.
Two noises are false alarms. A brief high-pitched squeal on a cold morning that disappears after a few stops is moisture and surface rust doing their thing. Squealing in the first few hundred miles after new pads are fitted is the bedding-in process, common with metallic compounds, and it should fade as the material beds in. Neither replaces a thickness check.
3. Inspect the Visible Pad and Rotor
You can often judge pad and rotor condition through the wheel spokes without removing anything, which takes about five minutes and needs only your flashlight. It is the quickest first pass when you are working out how to tell when brake pads need replacing, though it is not the last word.
Look for a pad that sits visibly thin in the caliper, a friction surface that looks uneven, cracked, crumbling or glazed to a smooth shine, and a rotor face with deep grooves, a raised lip at the edge, rust pitting or a bluish discolouration from overheating. Fluid on the backing plate or a puddle under the caliper means a leak.
Treat this as a screen, not a verdict. What you can see through the spokes is the outer face of one pad, and the inner pad on a floating caliper wears at a different rate. An estimate never beats a measurement, and only a measurement tells you whether you’re above or below the manufacturer’s minimum.
4. Measure the Pad Material to Tell If It Needs Replacing
Measure the friction material itself, from the steel backing plate to the surface of the pad, and ignore the backing plate in your reading. This is where most DIY checks go wrong, because people measure the whole pad and conclude there’s plenty left.
Place the caliper or ruler against the friction material at the thickest point of the pad, not the wear groove and not the tapered outer edge. Read the number, then repeat on the inner pad if you removed the wheel and on the other side of the car.
If one corner measures noticeably less than the others, that points at a sticking or dragging caliper rather than normal wear, and it deserves a diagnosis.
Some vehicles let you check through the spokes with a flashlight and a long ruler. Others need the wheel off to place a tool properly. If the caliper would need to be pushed back or pried to reach the pad, stop and let a shop do it, because forcing a caliper can crack the piston seal or damage the slider.
Whatever number you get, compare it to the minimum thickness in your owner’s manual rather than to a rule of thumb. Most manufacturers set a wear limit of roughly 3mm, and many mechanics change pads at 4-6mm so a car is never driven on bare metal.
5. Decide Whether the Vehicle Is Safe to Drive
Drive carefully to a repair appointment when you have a wear indicator squeal, a pad light with no other fault, a measurement above the manufacturer minimum, and no vibration, pulling or fluid leak.
Stop driving and arrange a tow or on-site repair when you hear grinding, see fluid under a caliper, get a brake system or ABS warning, notice heavy pulling to one side, feel the pedal travel unusually far, or measure a pad at or below the minimum thickness. Major rotor damage, deep grooves or cracking counts here too.
If you cannot assess the condition safely, because the wheels are off and you do not have a torque wrench and a safe way to support the car, the answer is a technician. Brakes are not a system to gamble on, and a jack under a car is not support.
Brake Pad Wear Stages
This chart turns a raw measurement into a decision. New pad thickness varies by vehicle, so read the top row against the size of your own pad.
| Thickness | Imperial equivalent | What it means | What to do |
|---|---|---|---|
| 10-12mm | about 3/8 to 1/2 inch | New pad out of the box | Nothing. Note the mileage as your baseline. |
| 6mm | about 1/4 inch | Roughly half the material gone | Start shopping parts and booking an appointment. |
| 4.5mm | about 3/16 inch | Most shops call this plan-for-replacement | Replace soon, before the next long trip. |
| 3mm | about 1/8 inch | Typical manufacturer minimum | Replace now. Below this you are braking closer to metal. |
| Under 3mm | under 1/8 inch | Past the discard thickness on most cars | Do not drive it. Rotor damage is likely already done. |
A grind that sounds like a coin dropping into a metal tin is the sound of a pad with nothing left to give. Once the friction material is gone, the steel plate itself meets the rotor, and that combination wears the rotor surface quickly and unevenly.
Rotor condition decides whether a pad-only job is sensible. Rotors carry a stamped minimum thickness, and once they are worn past it they cannot be machined back into spec. Deep grooves, a cracked hat or a heavy lip means new rotors alongside the pads, because a fresh pad on a grooved rotor pads out in a fraction of the normal life.
How Long Brake Pads Last and What Shortens Their Life
Most pads last between 25,000 and 60,000 miles, but that range assumes ordinary mixed driving. Inspect every 10,000-15,000 miles rather than trusting a fixed replacement date on a sticker, because how to tell when brake pads need replacing is a question about measurement, not about the calendar.
Front pads wear faster than rear pads on most vehicles, because more of the braking happens up front. On rear-biased setups and on cars where the rear caliper barely gets used, the rears can look nearly new long after the fronts are gone.
The usual accelerators of wear are stop-and-go city traffic, towing a trailer, long mountain descents, carrying a heavy load, and driving with worn brake pads to begin with, since a thin pad bites harder on the rotor. Driving habits that shorten life also make it less predictable, which is another argument for measuring instead of guessing.
Brake dust on the wheel is normal on almost any car and proves nothing on its own. Heavy dust with a wheel that has never been cleaned is worth a look, but a spotless wheel can still be sitting on a worn pad, and a dusty one can be fine.
Common Mistakes
Waiting for the warning light is the most common error, and the costliest. A pad wear sensor is a late-stage backup, not an early warning, and plenty of pads wear to the metal without a sensor ever sounding.
Judging by sound alone fails in both directions. Squealing can be cold morning moisture or new pads bedding in, and a failing wheel bearing can hum or growl that gets louder with speed while your pads are fine.
Measuring only the visible outer edge of the pad gives an optimistic reading. The edge is often the last part to wear, and on a floating caliper the inner pad can be thinner than the one you can see.
Forgetting the backing plate inflates the number. If your gauge spans the steel plate as well, subtract its roughly 5-6mm and you may find you are well under the limit you thought you cleared.
Replacing pads without looking at the rotors wastes money twice. Have the rotor face checked and the minimum thickness stamped on it read at the same time, and ask for the number rather than a yes or no.
When a shop tells you the pads are finished, verifying takes two minutes and settles the argument. Ask to see the pad, ask what it measures, and ask whether that is the friction material or the whole pad. A technician who won’t show you the measurement is telling you something.
Torque matters too. Over-tight wheel nuts are a known cause of warped rotors and vibration, so use a torque wrench and the manual’s figure rather than leaning on the wrench until it stops.
And never work under a car resting on a jack alone, or inspect hot brakes after a hard descent. Use jack stands, keep clear of hot components, and never pry or press a caliper to reach a pad.
Two habits pay off more than any gadget. Write down the date, mileage and reading each time you check, so the rate of wear becomes obvious, and follow the maintenance schedule in your owner’s manual rather than an online rule of thumb that was written for a different car.
Frequently Asked Questions
How long will brake pads usually last?
Most pads last between 25,000 and 60,000 miles under ordinary mixed driving. Stop-and-go city traffic, towing, heavy loads and long descents shorten that considerably, and front pads usually wear faster than rear ones. Rather than planning a replacement by mileage, measure the friction material every 10,000 to 15,000 miles and let the number, not the calendar, decide.
Does squealing always mean the brake pads need replacing?
Not always. A brief squeal on a cold morning that clears after a few stops is usually moisture and surface rust. Squealing in the first few hundred miles after fitting new pads is common with metallic compounds and fades as the material beds in. A squeal that gets louder the faster you drive is more likely genuine wear, but only a thickness measurement confirms it.
How thin is too thin for brake pads?
Three millimetres, about 1/8 inch, of friction material is the commonly cited manufacturer minimum, and many shops replace at 4 to 6mm so you never drive on bare metal. Measure the friction material alone, not the pad including its steel backing plate. Your owner’s manual sets the limit for your vehicle, so it takes priority over any general figure.
Do the brake rotors need replacing at the same time?
Often yes, and the rotor decides. Rotors have a stamped minimum thickness that is read at the outer edge, and if they are already below it they cannot be machined back into specification. Deep grooves, a heavy lip, a cracked hat or visible blue discolouration all point to replacing rotors with the pads, because fresh pads on a worn rotor wear out fast.
Is it safe to drive after a brake pad warning light comes on?
A pad wear light means a sensor has detected wear down to a set depth, so the car should be booked in promptly rather than driven indefinitely. Keep driving distance short and avoid heavy braking, towing and steep descents until it is looked at. If you also have a brake system or ABS warning, grinding, a leak or a soft pedal, stop driving and arrange a tow instead.
What is the 30/30/30 rule for brakes?
It is shorthand rather than a specification, and versions differ. The most common version means inspect brakes and pads every 30,000 miles, check brake fluid every 30,000 miles, and have the fluid changed roughly every 30,000 miles, sometimes adjusted to 30 months. Treat it as a starting reminder only, and use the intervals and fluid specification in your owner’s manual as the authority for your car.
What to Do First
If you have no warning light and no noise, put a flashlight and a ruler to work this weekend and write down what you find on all four corners. A number in your phone notes beats a memory, and the rate of change between checks is the most useful thing you will ever learn about your own car.
If you have a squeal that fades, a pad light, or a pad measuring above the manufacturer minimum with no vibration or pulling, book a shop appointment soon and keep the driving gentle in the meantime.
If you have grinding, a leak, a soft pedal, a brake system warning or a measurement at or under 3mm, stop driving the car and get it to a technician. Knowing how to tell when brake pads need replacing is useful, but knowing when the answer is a mechanic is what keeps you safe.