Jump-starting a car takes about ten minutes and three moves: connect the cables positive first, start the donor car, then pull the cables off in reverse order. Knowing how to jump start a car safely matters as much as the connection itself, since one clamp on the wrong post can burn out electronics and turn a free rescue into a repair bill.
Before you touch a tool, look at the dead battery. If it’s cracked, leaking, swollen along the sides, or frozen solid, don’t jump it. Call roadside assistance and let them tow the car.
The skill itself is easy. Rushing is what hurts people.
Table of Contents
- What You Need to Jump Start a Car Safely
- Step-by-Step
- Step 1: Confirm the Dead Battery and Both Cars
- Step 2: Position the Vehicles and Turn Off Accessories
- Step 3: Locate the Battery Terminals
- Step 4: Attach the Red Cable to the Dead Battery
- Step 5: Attach the Red Cable to the Donor Battery
- Step 6: Attach the Black Cable to the Donor Battery
- Step 7: Attach the Black Cable to the Dead Vehicle
- Step 8: Start the Engine and Disconnect Safely
- Common Mistakes
- Frequently Asked Questions
- How to jump start a car safely without another car?
- When jumping a dead battery, which car do you start first?
- How long should I wait before trying to crank the engine?
- Why does the last jumper cable connection spark?
- Can you jump start a car in the rain?
- Can you jump start a hybrid or an electric vehicle?
- Conclusion
What You Need to Jump Start a Car Safely
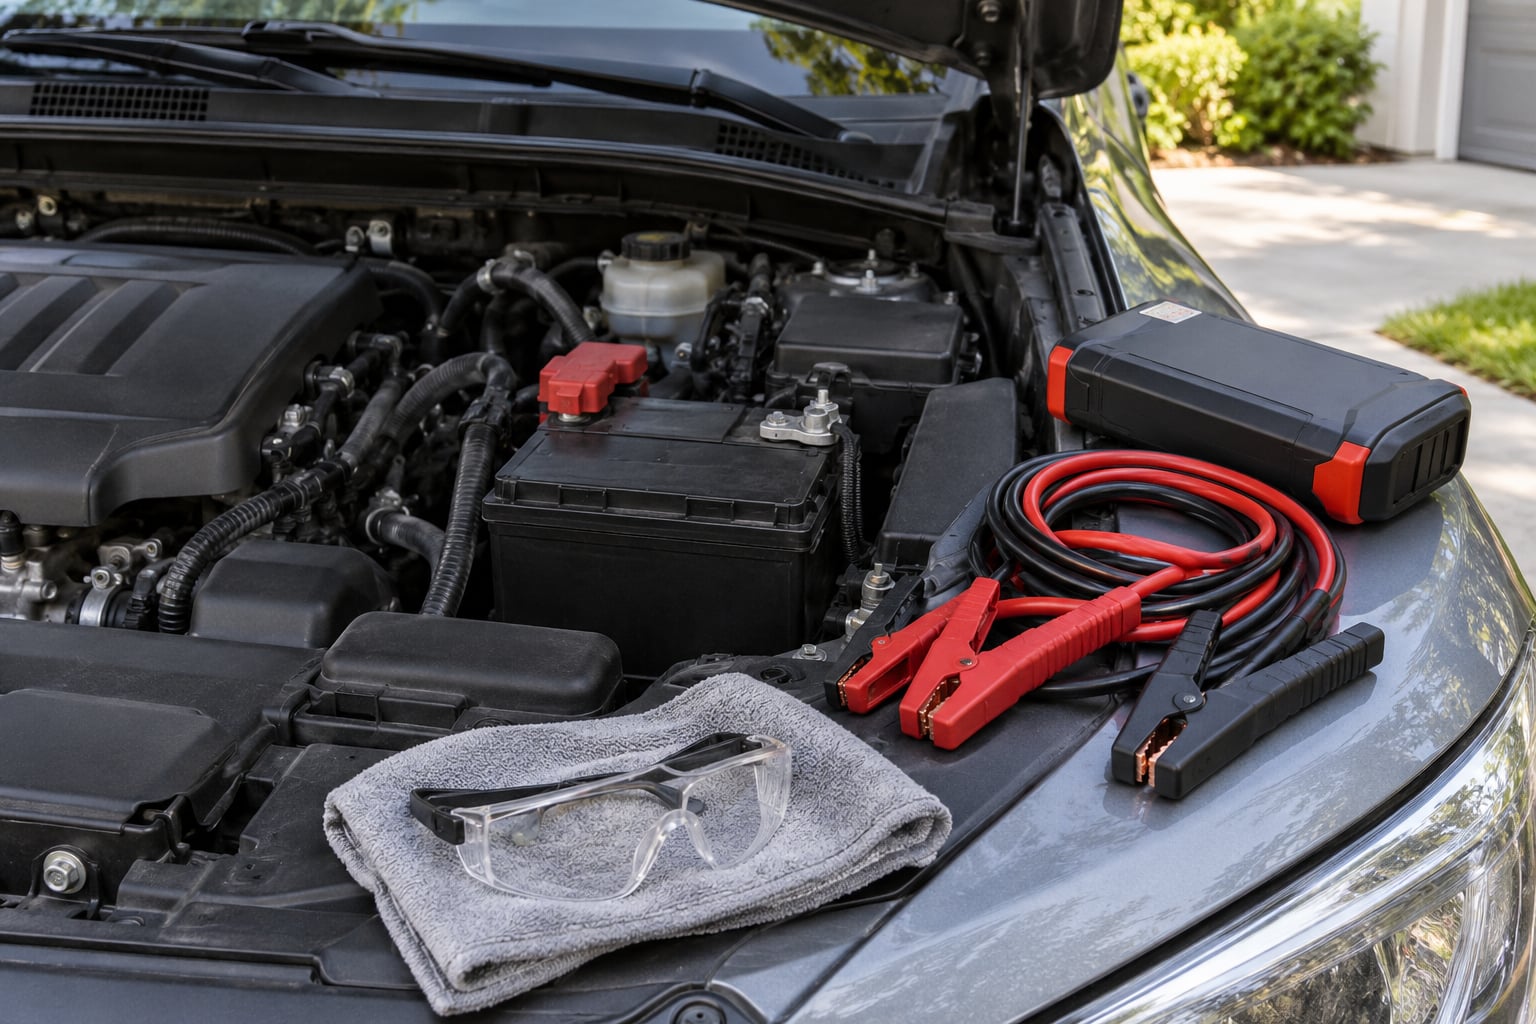
A jump start needs two things most drivers are missing: a donor vehicle with a healthy battery, and cables that actually make contact. Here’s the full kit.
- A donor car with a good 12-volt battery that starts and idles on its own
- Jumper cables, 16 to 20 feet long, 4- to 6-gauge, with insulated clamps that fit both battery posts
- Safety goggles
- Insulated rubber gloves
- Baking soda, a damp rag, and a wire brush or terminal cleaner for crusty posts
- Both owners’ manuals, in case your car uses an alternate procedure
- A phone with the roadside assistance number already saved
Check the donor battery before you commit. With the donor engine off, a battery tester or multimeter should read 12.6 volts or higher; anything under about 12.2 volts is too weak to help. Then start it and confirm it idles smoothly and that the headlights look bright rather than dim. A donor car with a dying battery can leave you with two dead cars.
On cables, the gauge number works backwards: a 4-gauge cable is thicker than a 6-gauge one, and thicker cable carries more current with less voltage drop. Length matters too. Long enough to park the vehicles a few feet apart with both hoods open, but never so long that it drapes over a hot engine or a moving fan.
Step-by-Step
Which car do you start first? The donor — the one with the working battery. Start it, leave the engine running, and give it five to ten minutes so its alternator can push current through the cables into the dead battery before you crank. Fifteen to twenty minutes is a fair upper limit; if the engine still won’t turn over after that, the battery is probably too far gone and you should stop and call for a tow.
Step 1: Confirm the Dead Battery and Both Cars
A dead battery usually gives you a slow, groaning crank or a rapid click-click-click and no engine. Park somewhere flat, out of traffic, with the parking brake on and the transmission in Park for an automatic or in neutral with the brake applied for a manual. Take both keys out of the ignitions so neither engine starts by accident. Read the dead car’s manual for jump-start instructions, because a few manufacturers specify a different ground point or a specific ignition position.
Step 2: Position the Vehicles and Turn Off Accessories
Line the cars up nose to nose with a few feet of space between them, open both hoods, and make sure the bodies never touch. A metal-to-metal bridge between the two chassis creates a direct short, and you will see sparks fly. Turn off headlights, radios, phone chargers, heated seats, and the climate blower in both cars, and leave the ignitions off. Keep everyone away from the front of the vehicles while the cables are on.
Step 3: Locate the Battery Terminals
Most 12-volt batteries are in the engine bay, but some models tuck them under the seat or in the trunk, and a few hybrids hide theirs behind a trim panel. Positive is marked with a plus sign or a red plastic cap; negative is marked with a minus sign or a black cap. On an unmarked or covered battery, check the post size — the positive post is slightly wider — or put a multimeter on the terminals, where the positive side reads higher. Wipe off green or white corrosion with the baking soda paste and a brush before you clamp on, and keep both clamps from touching bare metal across the two batteries.
Step 4: Attach the Red Cable to the Dead Battery
Connect the red positive clamp to the positive terminal of the dead battery first. Squeeze the clamp hard until the jaws grip the post fully, then give it a tug to confirm it will not slide off. Do not clamp onto the battery’s negative post or the metal clamp bar next to it. This first connection matters more than people expect: attaching the cables to a powered battery and only then touching the dead one is what turns a small mistake into a shower of sparks and melted cable insulation.
Step 5: Attach the Red Cable to the Donor Battery
Take the other red clamp and connect it to the positive terminal of the donor battery. Now pause and check both red connections: one on each battery’s positive post, and nowhere near a negative. Route the cable away from the throttle body, intake, and hot exhaust parts so it can’t slide into moving parts when you crank. A few seconds of visual confirmation here saves the whole procedure.
Step 6: Attach the Black Cable to the Donor Battery
Connect the black negative clamp to the donor battery’s negative terminal. This is the last time you work on a live battery, so keep the free clamp clear of the positive post as you swing it across. If a clamp slips and touches the wrong post while the donor engine is running, you get a hard short and a burst of sparks. Hold the insulated handle, keep your hands on the plastic, and keep the black cable at least a few inches from the red one along its run.
Step 7: Attach the Black Cable to the Dead Vehicle
Take the final black clamp to an unpainted, solid metal grounding point on the dead car — a bolt on the engine block or the chassis away from the battery, and away from the throttle and any moving belt or fan. Mechanics consistently prefer this over the dead battery’s negative post because the spark happens away from hydrogen gas a drained battery can off-gas. A small pop of spark here is normal. Several owners’ manuals do specify the negative post instead, so follow your manual if it says so, and never connect all four battery terminals — that simply shorts the two batteries together.
Step 8: Start the Engine and Disconnect Safely
With everything connected, turn the key in the dead car and crank. If it catches, let it idle for a minute or two, then drive for 20 to 30 minutes so the alternator can put a real charge back into the battery. Disconnect in the exact reverse order: black from the dead car’s ground, black from the donor’s negative post, red from the donor’s positive, then red from the dead car’s positive. Take the clamps off the dead car first and never let them touch each other or either battery while you work.
Common Mistakes
Almost every damaged jumper setup traces back to one of these.
- Connecting negative first. Fix: always finish at the ground point, dead car last. The order exists so the last spark stays away from the battery.
- Reversed polarity, red on negative. Fix: check the signs twice. Afterward, look for dim headlights, a radio or dashboard that will not power up, a burnt plastic smell, warning lights, or blown fuses. A small brief contact usually pops a fuse; a longer one under load can burn wiring and modules. Have a shop look before you drive it.
- Loose clamps. Fix: squeeze until the jaws bite the post and tug to test. A clamp hanging off the side causes arcing, flicker, and a no-start.
- Clamps touching each other or the vehicle bodies. Fix: keep the red and black cables separated and the cars a few feet apart.
- Jumping a damaged battery. Fix: cracked, leaking, swollen, or frozen means tow, not cables.
- Accessories left on. Fix: headlights, radio, and blower off in both cars. A draw on the dead battery can eat the charge you just pushed in.
- Cables draped over hot parts. Fix: keep them clear of the exhaust manifold, engine fans, and belts.
- Cranking over and over. Fix: two or three tries with a few minutes between them, then stop. Repeated cranking drains both batteries and overheats the starter motor.
- Working in fuel or near a spill. Fix: a flooded or badly leaking area plus a spark is a fire risk. Move the car or call for help.
If the engine cranks but does not start after two or three tries, the problem may not be the battery at all. A failed starter solenoid, a bad alternator, a blown fuse, or a tank of fuel that has gone bad will all produce a dead-sounding morning. That is the moment to call roadside assistance rather than keep guessing.
Frequently Asked Questions
How to jump start a car safely without another car?
Use a portable jump starter, a jump pack with its own built-in 12-volt battery and clamps. Charge it fully, switch it off, attach the red clamp to your positive terminal and the black clamp to a ground point away from the battery, turn it on, and crank for no more than a few seconds. This works without a donor car, and it is the safest option in a parking lot or on the side of a highway.
When jumping a dead battery, which car do you start first?
Start the donor car, the one with the healthy battery. Give it five to ten minutes at a fast idle before you crank the dead vehicle, so its alternator can push current through the cables. If you crank the dead car first you will drain both batteries and make the whole job harder, and you may not be able to restart the donor to try again.
How long should I wait before trying to crank the engine?
Five to ten minutes of the donor car running at a fast idle is the usual range, and fifteen to twenty minutes is a reasonable ceiling before you accept that the battery will not recover. A battery that has been deeply discharged holds almost no charge, so more time adds nothing. Three failed attempts, spaced a few minutes apart, is a reasonable limit before you call for a tow.
Why does the last jumper cable connection spark?
A small spark on the final ground connection is normal. That clamp completes the circuit, and the sudden rush of current across a small contact point creates a brief flash. What matters is where it happens: connecting to a ground point away from the battery keeps it away from the hydrogen gas a drained battery can off-gas. A large sustained spark, smoke, or a puff is not normal, so back off and check your connections.
Can you jump start a car in the rain?
Yes. A little water on the cables will not stop the procedure, and jump-starting in the rain is no more dangerous than doing it dry. Just keep the clamps from resting in a puddle, wipe any standing water off both battery posts before you attach them, and stay clear of flooding water, which hides hazards and can be electrified. Goggles and gloves still make sense.
Can you jump start a hybrid or an electric vehicle?
A hybrid with a dead 12-volt battery can usually be jump-started through the under-hood jump terminals, and the same connection order applies. Never attach cables to the high-voltage orange cables or connectors. A fully electric vehicle has no 12-volt starter system to rescue, so a jump start will not help. Check the owners’ manual for the designated terminals, and tell whoever you ask for help that the car is electric.
Conclusion
Start with the inspection, not the cables. If the battery is cracked, leaking, swollen, or frozen, call for a tow. Otherwise confirm the donor battery is healthy, park the cars apart with everything switched off, and work the order strictly: red on the dead positive, red on the donor positive, black on the donor negative, black to a ground point on the dead car. Start the donor, wait five to ten minutes, crank, then remove the cables in reverse and drive for 20 to 30 minutes to recharge. Stop and ask for help if the engine will not start after a couple of attempts or if you smell burning, see smoke, or notice warning lights.